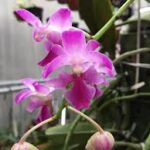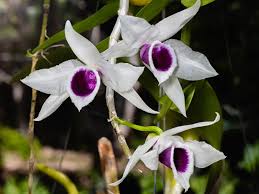
Phalaenopsis orchids, commonly known as moth orchids, are prized for their stunning flowers and graceful presence. These tropical plants thrive in humid conditions, making it essential for orchid enthusiasts to replicate their natural habitat to ensure healthy growth and vibrant blooms. This article explores various methods to create and maintain a humid environment for Phalaenopsis orchids at home, ensuring these beautiful plants flourish.
## Understanding Phalaenopsis Orchids
Before delving into humidity management, it’s essential to understand the specific needs of Phalaenopsis orchids.
### 1. Native Habitat
Phalaenopsis orchids are native to tropical regions of Asia, where they grow as epiphytes. In their natural habitat, they receive high humidity levels ranging from 50% to 70%. They typically grow in the canopies of trees, where they receive filtered sunlight and ample moisture from the surrounding environment.
### 2. Importance of Humidity
Humidity is crucial for Phalaenopsis orchids for several reasons:
– **Water Absorption**: Orchids absorb water through their leaves and roots. High humidity helps maintain adequate moisture levels in the air, allowing the plant to absorb water effectively.
– **Preventing Stress**: Low humidity can cause stress in orchids, leading to wilting, leaf drop, and poor flowering.
– **Disease Resistance**: Adequate humidity can help strengthen the plant’s immune system, reducing susceptibility to diseases and pests.
### 3. Ideal Conditions
To create the perfect environment for Phalaenopsis orchids, it’s vital to consider temperature, light, and humidity:
– **Temperature**: Ideally, daytime temperatures should be between 20°C to 30°C (68°F to 86°F), with nighttime temperatures around 15°C to 20°C (59°F to 68°F).
– **Light**: Phalaenopsis orchids thrive in bright, indirect light. Direct sunlight can scorch their leaves, so filtered light is recommended.
## Methods to Create Humidity for Phalaenopsis Orchids
### 1. Humidity Trays
**Using humidity trays is one of the simplest methods to increase humidity around your orchids.**
#### A. Materials Needed
– Shallow trays or saucers
– Small pebbles or marbles
– Water
#### B. Steps
1. **Fill the Tray**: Place a layer of small pebbles or marbles in the shallow tray.
2. **Add Water**: Fill the tray with water until it reaches just below the top of the pebbles.
3. **Position Your Orchids**: Set your Phalaenopsis orchids on top of the pebbles. Ensure that the pots are not sitting directly in the water, as this can lead to root rot.
4. **Monitor Water Levels**: Regularly check the water level and refill as needed to maintain humidity.
### 2. Misting
Misting your orchids can provide a quick boost of humidity, especially during dry seasons.
#### A. Misting Technique
– Use a spray bottle filled with room-temperature water.
– Mist the leaves and air around the orchids in the morning or early afternoon to allow excess moisture to evaporate throughout the day.
– Avoid misting in the evening, as this can lead to prolonged moisture on the leaves, increasing the risk of fungal infections.
### 3. Grouping Plants
Grouping your Phalaenopsis orchids with other plants can create a microclimate with higher humidity levels.
#### A. Benefits of Plant Grouping
– Plants naturally release moisture through a process called transpiration. By grouping orchids together, the combined moisture will elevate the humidity in their immediate environment.
– This method works best in a bright area where all plants can receive adequate light.
### 4. Using a Humidifier
Investing in a humidifier is an effective way to maintain consistent humidity levels.
#### A. Types of Humidifiers
– **Ultrasonic Humidifiers**: These produce a fine mist and are energy-efficient.
– **Evaporative Humidifiers**: These use a fan to blow air through a wet wick or filter, increasing humidity levels.
#### B. Placement Tips
– Position the humidifier near your orchids but not directly on them to avoid excessive moisture on the leaves.
– Set the humidifier to maintain humidity levels between 50% to 70%.
### 5. Terrariums and Wardian Cases
For a more controlled environment, consider using terrariums or Wardian cases.
#### A. Creating a Terrarium
1. **Choose a Container**: Select a glass container with adequate ventilation.
2. **Layer the Bottom**: Add a layer of pebbles for drainage, followed by activated charcoal to filter the air.
3. **Add a Growing Medium**: Use a suitable potting mix for orchids, such as a bark-based medium.
4. **Plant Your Orchids**: Carefully place the Phalaenopsis orchids in the container, ensuring they are secure.
5. **Cover and Monitor**: Cover the terrarium with a lid or plastic wrap to maintain humidity. Check regularly for condensation and remove the cover if moisture levels are too high.
### 6. Using Sphagnum Moss
Sphagnum moss is excellent for maintaining humidity around your orchids.
#### A. How to Use Sphagnum Moss
1. **Moisten the Moss**: Soak sphagnum moss in water and squeeze out excess moisture.
2. **Place Around the Orchid**: Gently wrap the moss around the base of the orchid pot or place it on top of the potting medium.
3. **Maintain Moisture**: Check the moss regularly and rehydrate as needed to keep it moist.
### 7. Bathroom Placement
If you have a bathroom with a window, this can be an ideal location for your Phalaenopsis orchids.
#### A. Benefits of Bathroom Placement
– Bathrooms often have higher humidity levels due to showers and baths, creating a suitable environment for orchids.
– Ensure the bathroom has adequate light, either from a window or grow lights.
### 8. Fogging Systems
For those looking for a more automated solution, consider installing a fogging system.
#### A. Fogging System Features
– Fogging systems use high-pressure pumps to create a fine mist, maintaining high humidity levels in greenhouses or indoor spaces.
– They can be set on timers to provide consistent humidity throughout the day.
### 9. Monitoring Humidity Levels
To ensure your Phalaenopsis orchids are thriving, it’s essential to monitor humidity levels.
#### A. Using a Hygrometer
– A hygrometer is a simple device that measures humidity levels in the air.
– Place the hygrometer near your orchids to keep track of humidity fluctuations.
#### B. Ideal Humidity Range
– Aim to maintain humidity levels between 50% and 70% for optimal growth and flowering.
## Troubleshooting Humidity Issues
### 1. Signs of Low Humidity
If your orchids are experiencing low humidity, you may notice the following signs:
– Leaf tips turning brown and crispy
– Wilting or drooping leaves
– Stunted growth and reduced flowering
### 2. Signs of Excess Humidity
Excess humidity can lead to issues such as:
– Mold or fungus on the leaves or potting medium
– Root rot, which can be fatal to orchids
– Pest infestations, particularly fungus gnats
## Conclusion
Creating a humid environment for Phalaenopsis orchids at home is essential for their health and vibrancy. By utilizing various methods, such as humidity trays, misting, grouping plants, and investing in a humidifier, you can replicate the orchids’ native tropical conditions.
Regular monitoring of humidity levels and being attentive to the needs of your orchids will ensure they thrive in your care. With the right humidity management techniques, your Phalaenopsis orchids can flourish, providing you with stunning blooms and a beautiful addition to your home. Embrace the beauty of these exquisite plants and enjoy the satisfaction of nurturing them in an environment that meets their specific needs.
